Create a Private Event
Use the following steps to create and build a Private Event. When to use Private Events?
When your customer wants a tailored offer, and not a joined trip through Bilberry widgets on your website.
When you receive a request through the Request Tour widget.
Note! It’s possible to service requests through other Bilberry functions in the backend.When you want to create a package with joined trips, your own products and/or products from the Bilberry Partner Network.
When you want to send your customer a detailed, visual offer.
Creating a Private Event
You have two options, but the end result is the same:
Option 1:
Click
Projects and Projects in the left main menu, then click on the blue button, Create Project.
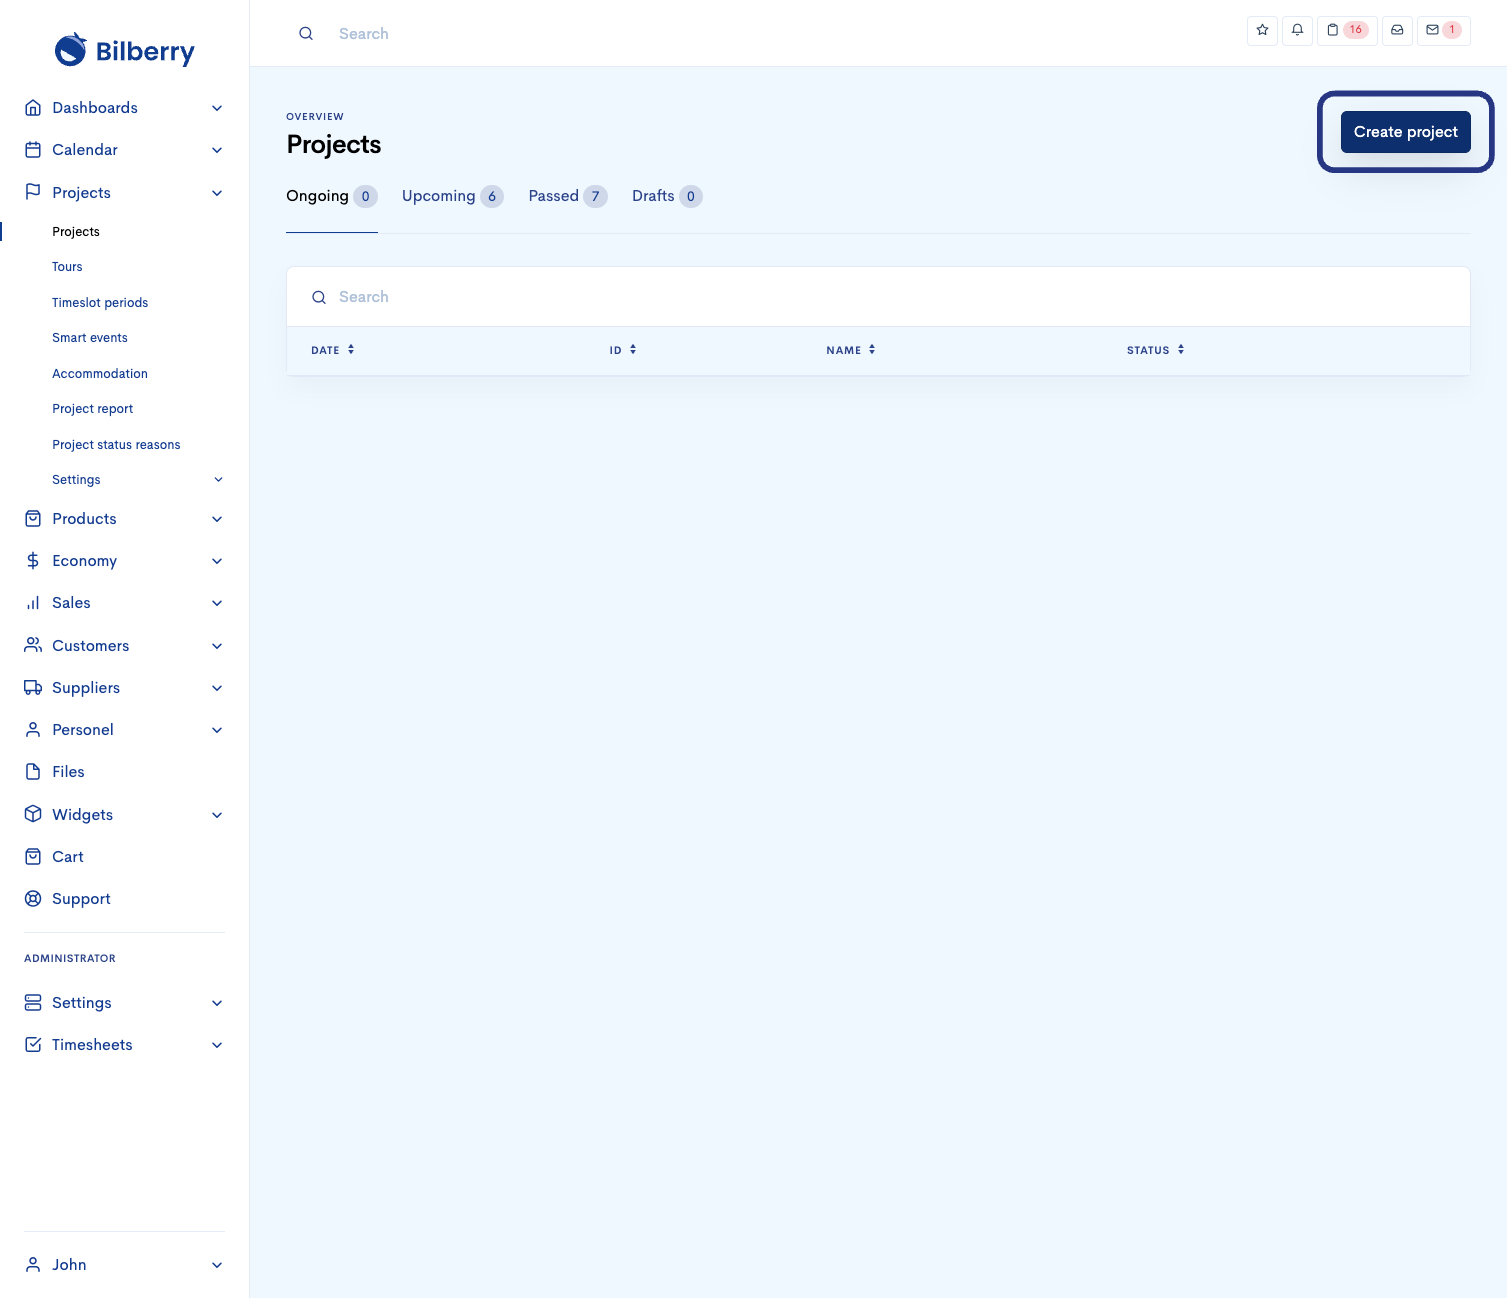
Fill out
Project name, Date range, Group size, Project language, Customer and POC (Point of Contact), Project description (for internal use), Tags (for filtering project report) and then click, Create project.
Project name, Data range and Group size is mandatory to fill out, but all info can be added and/or changed after you’ve created the private event.
Customer and POC - If you haven’t already created these, you can do this through the link, Create new customer, that’s on the right side of Customer.
Tags - Click Projects, Settings and Project tags in the main menu, then click Add new tag to create project tags.

Option 2:
Click Calendar, then Month, in the left main menu, any date in the calendar overview and Register project.
Fill out the same info as in option 1.

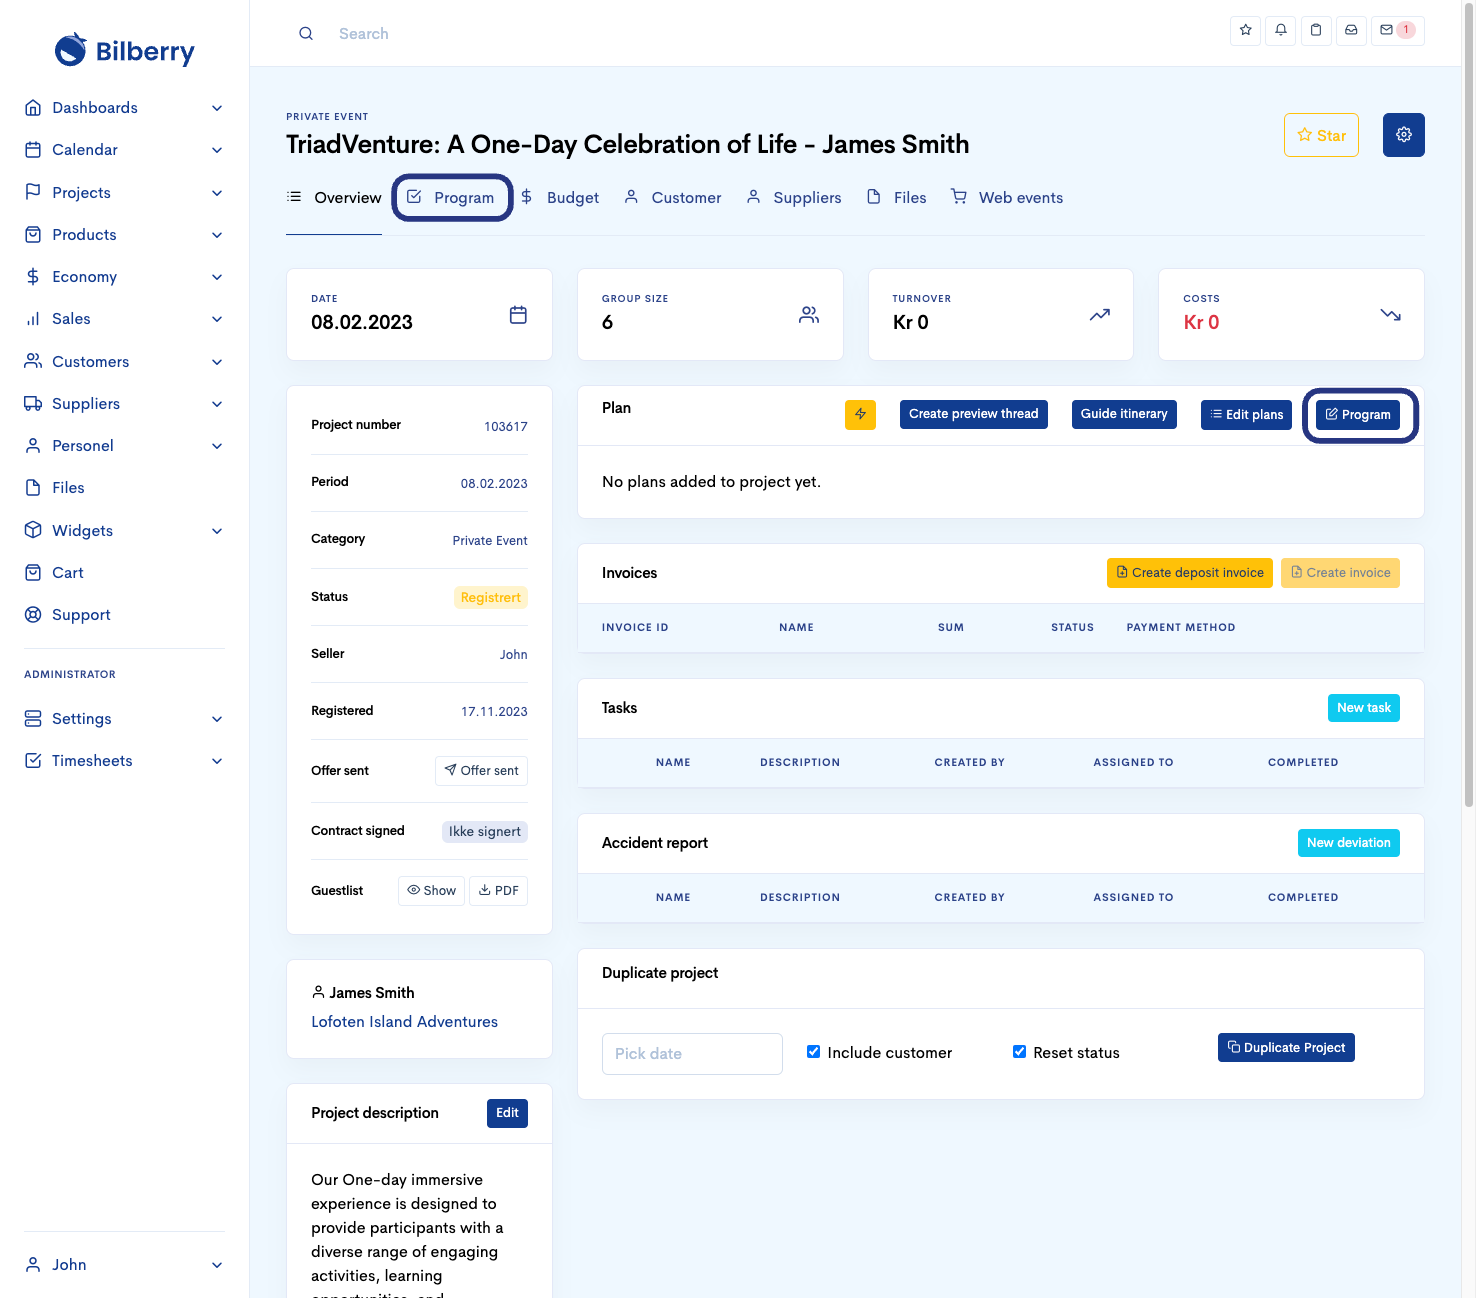
Adding/Editing Products, Joined Trips and/or Bilberry Partner Network Products
You need to add plans to your project Plan, so you have something to offer your customer. Click on the blue button, Program, inside your private event, or on Program under the private event title, to go to Program designer.
Once your in the program designer, you can start adding your own Products, Joined Trips, and/or products from the Bilberry Partner Network. If you choose to add your own product, you can tailor the Name and set your own Start and End date and time. With joined trips or products from the Bilberry Partner Network, the name, date and time is already set, so you must choose what fits your project best from what’s available.
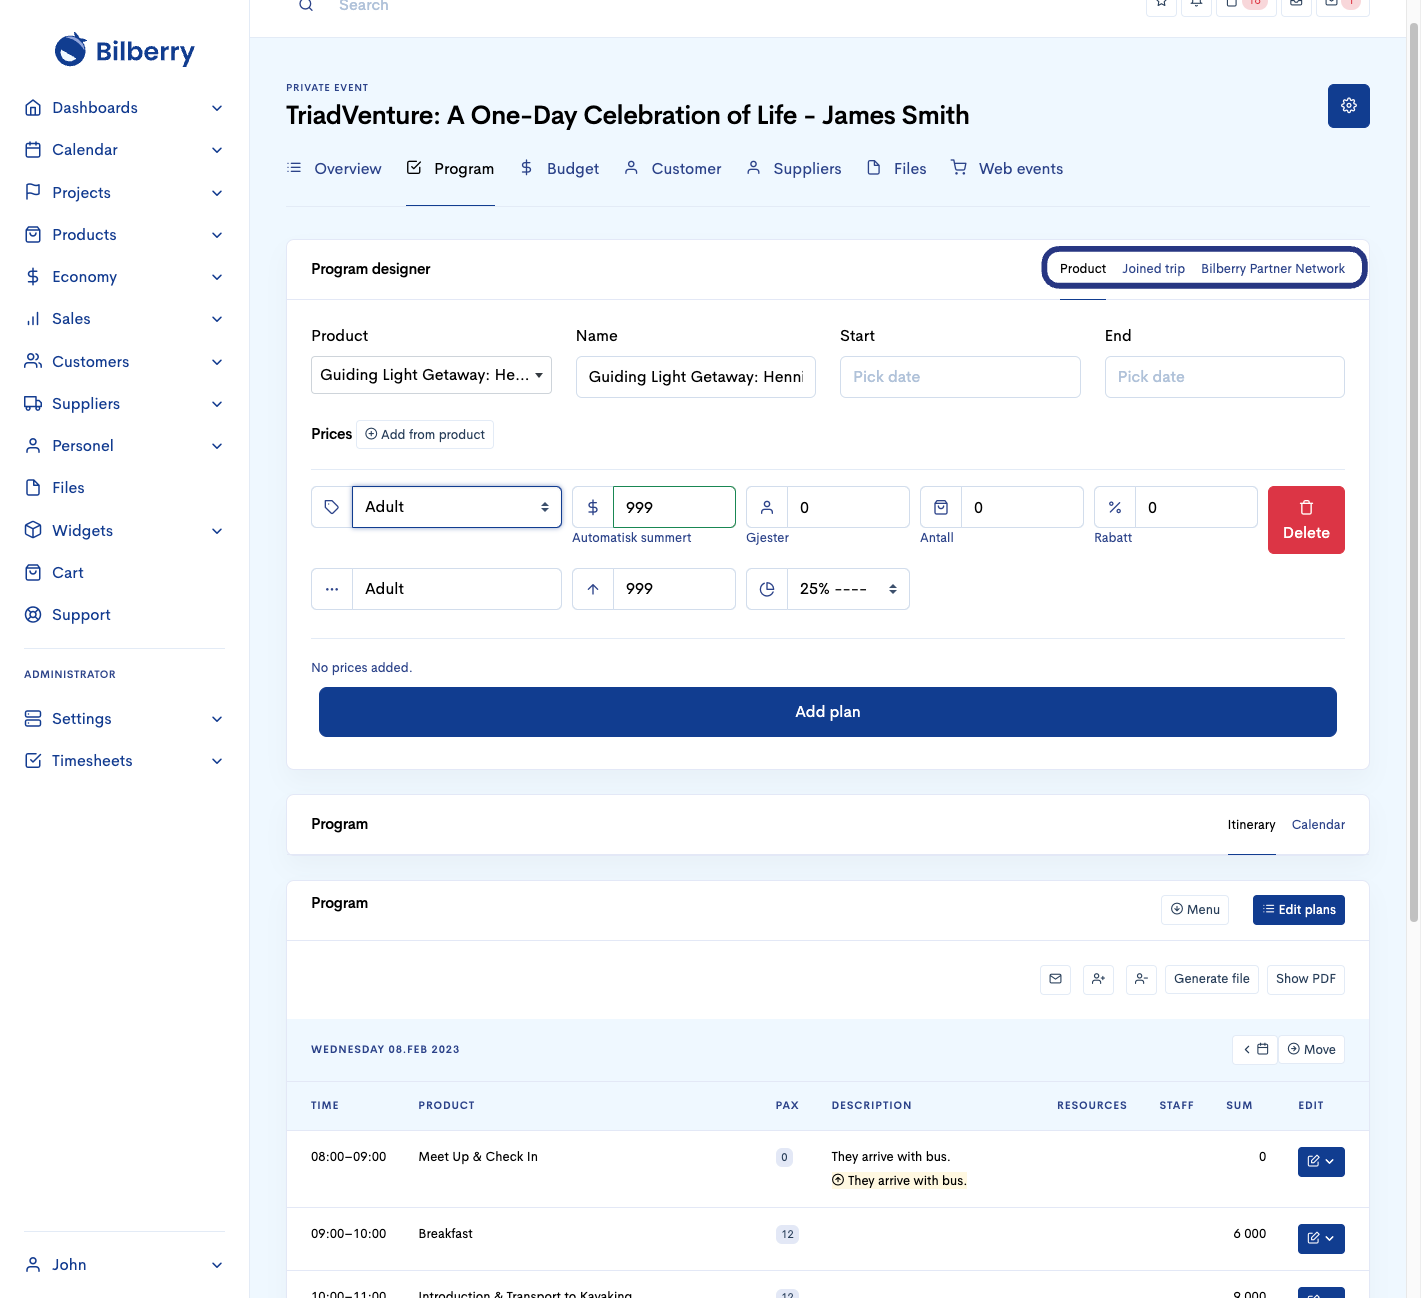
While you add, you can use the Program overview on the bottom for smooth working. And if you want to change or add something, you can easily do this by pushing the blue pencil button on the right side. Click on Overview under the private event name when you are finished with adding/editing your program.
Tip! If you want to add plans to your program that isn’t a product you sell, for example Break, Recess, Leisure Time, or something similar, we recommend you create separate product(s) for this, so that it does not affect your Economic or Sales reports.
Sending out your Private Event
Confirming your Private Event
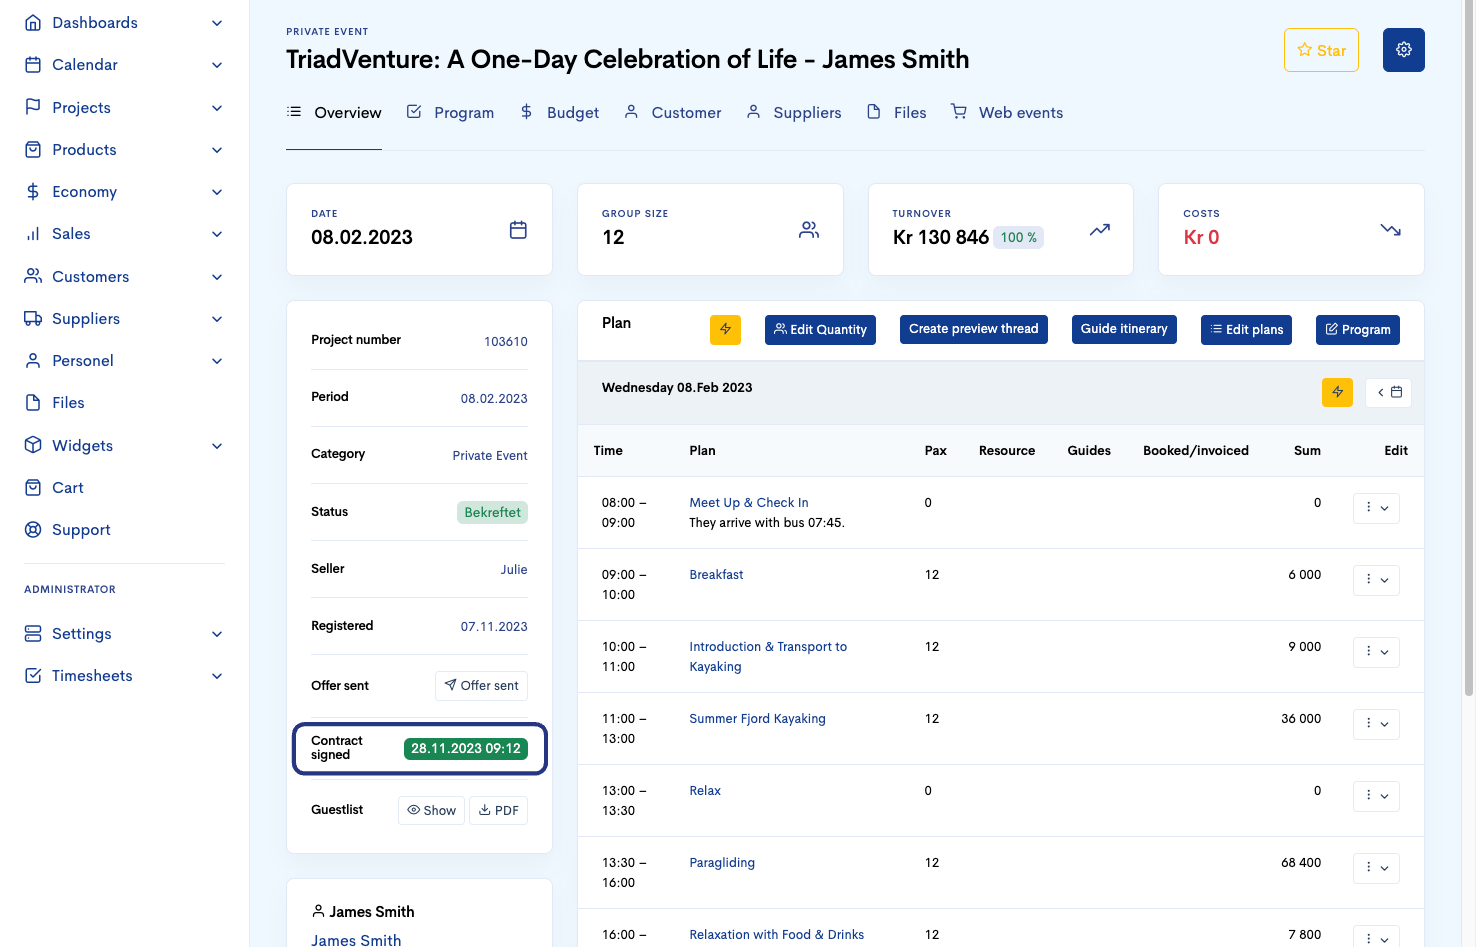
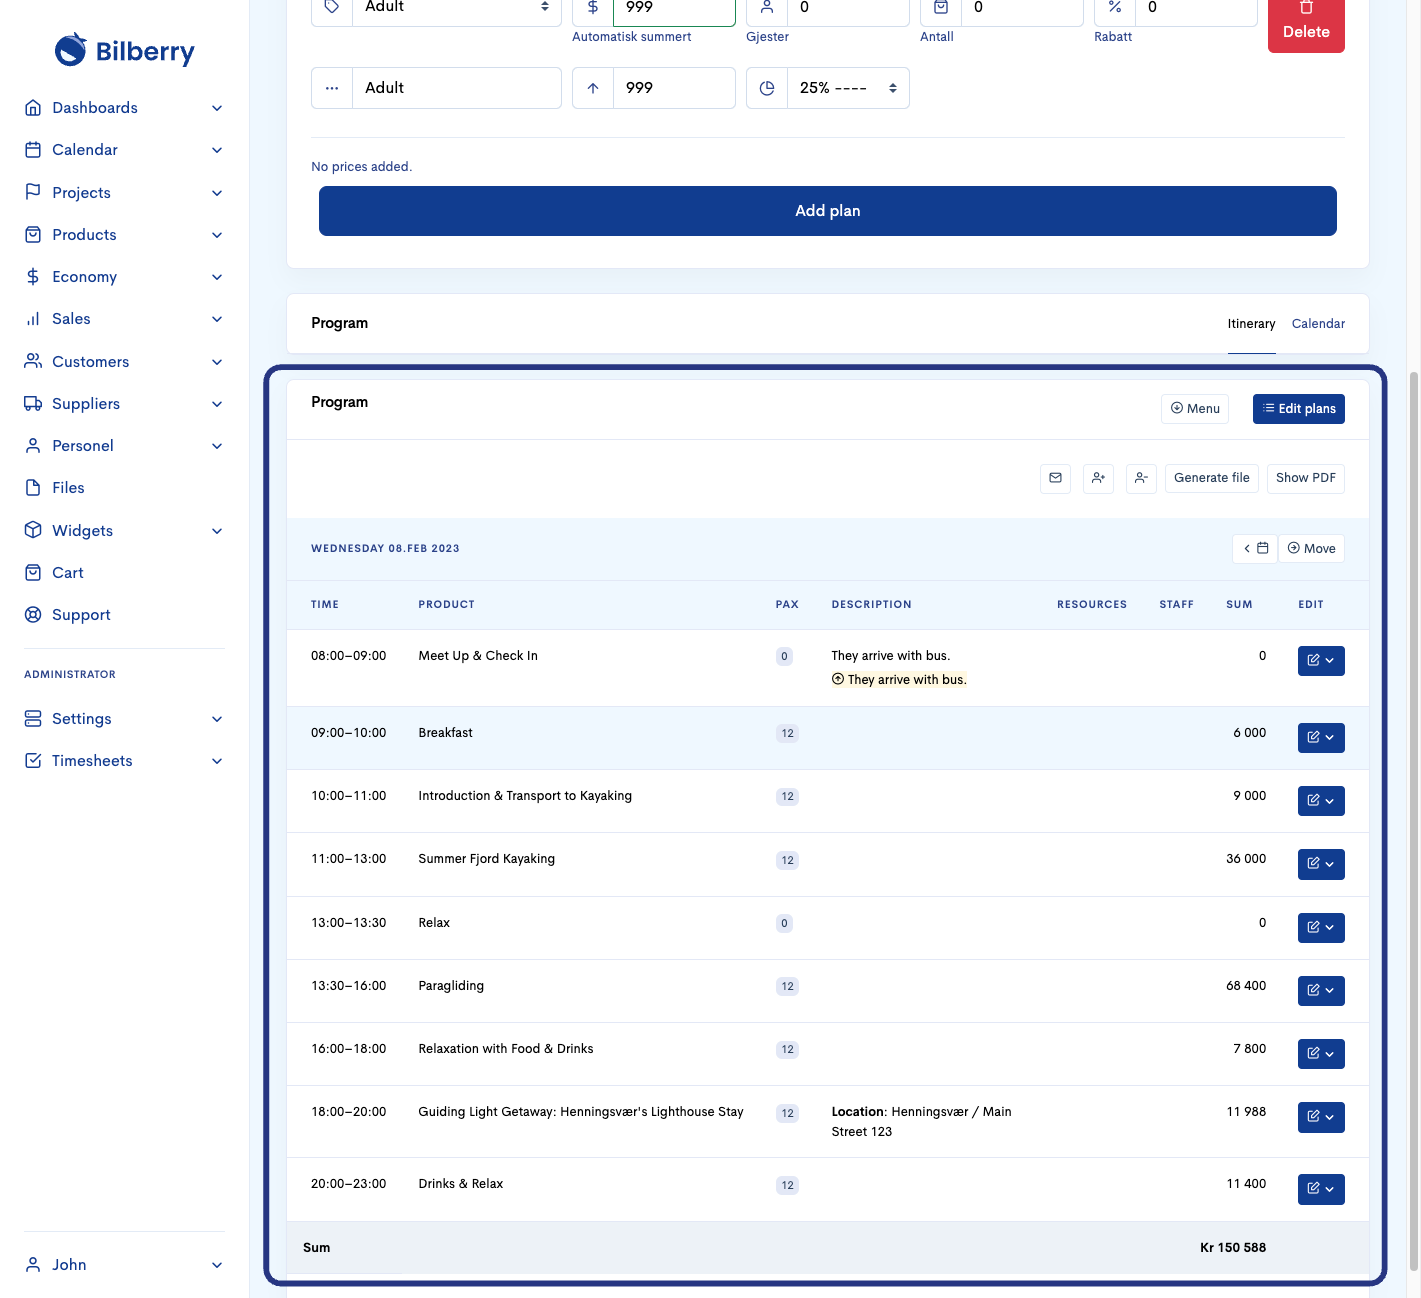
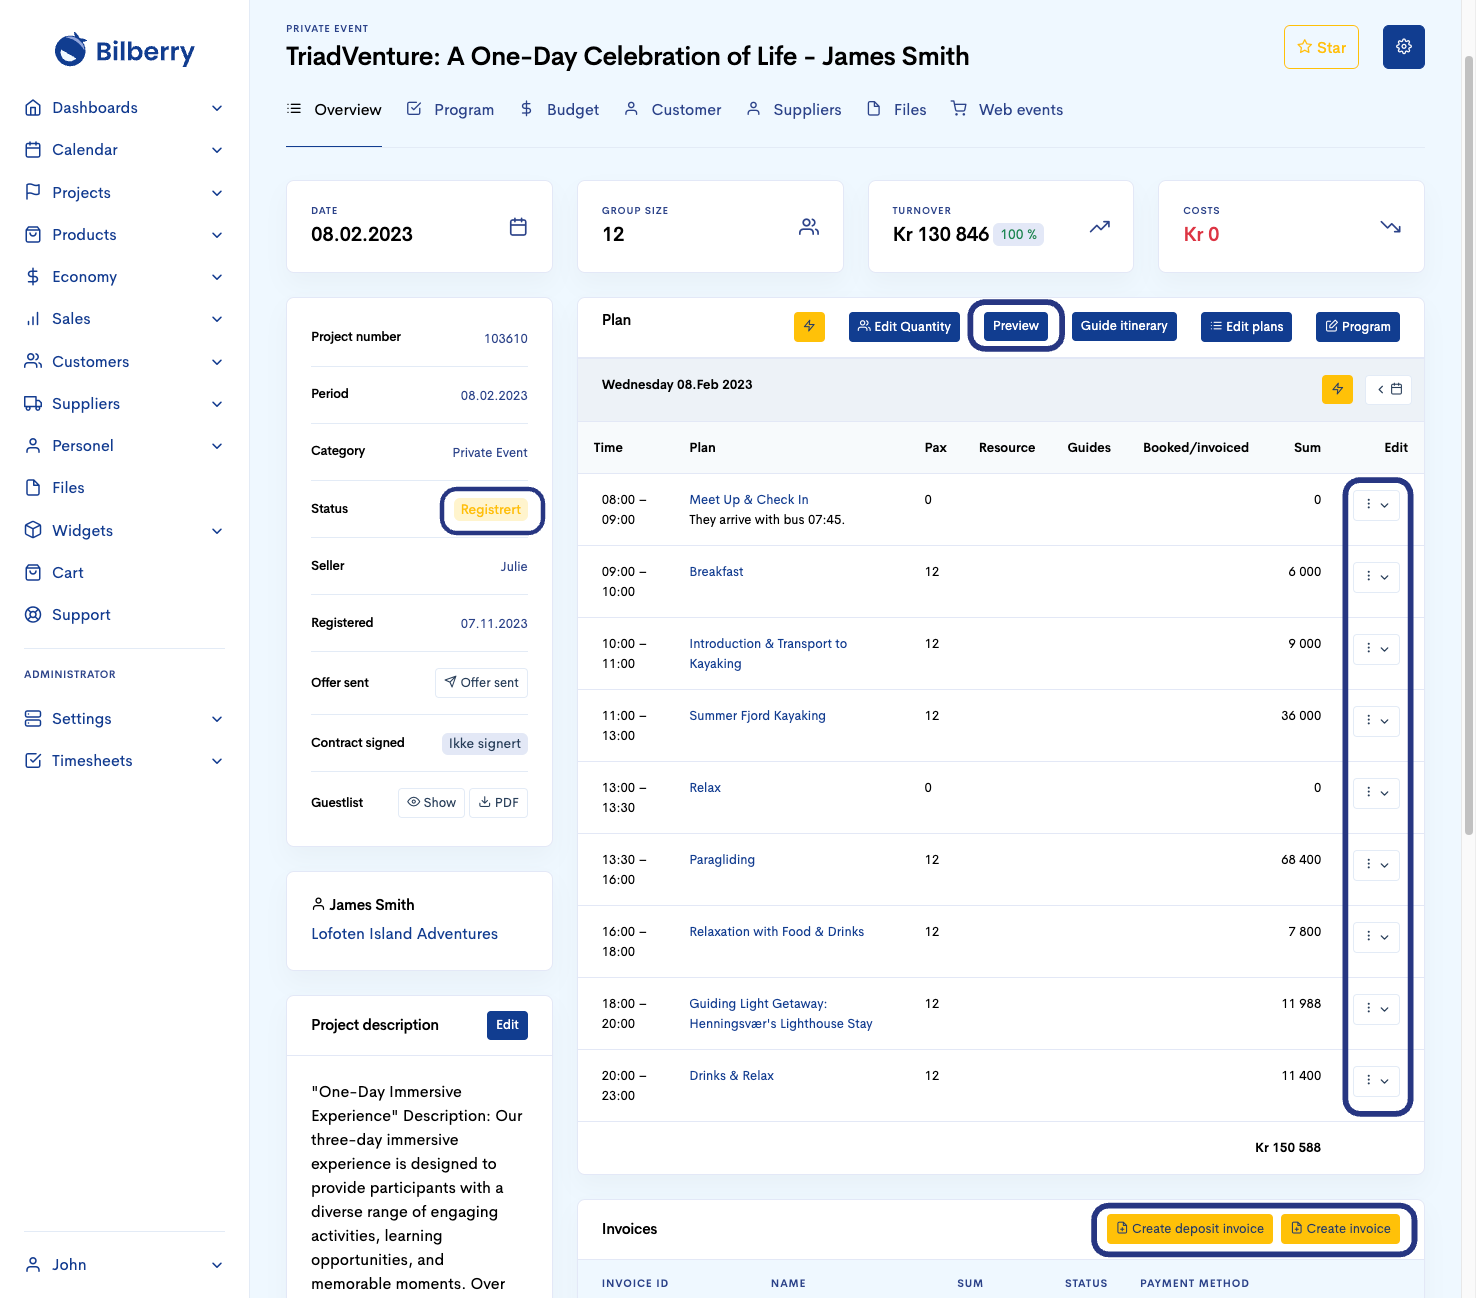
Your program could look something like this (see picture) after you are finished working in the program designer. From here you can also edit/tweak the plan by clicking on the three dots on the right side, or go back into the program designer.
When your private event plan is done, these are the most likely scenarios going forward:
Scenario 1 - The private event plan is confirmed by email, phone, etc, so there is no need to send it to your customer before confirming it.
Click on the Registered status and change it to Confirmed, then invoice the customer.
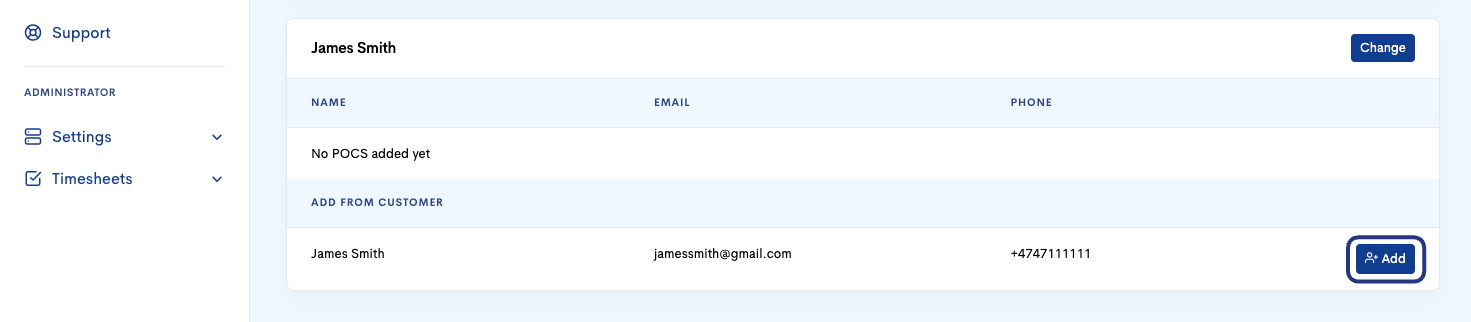
Scenario 2 - The private event plan needs to be accepted by your customer before confirming it.
Click on Customer under the private event title, then click Add on the customer contact you want to send it to, and then click Send mail.

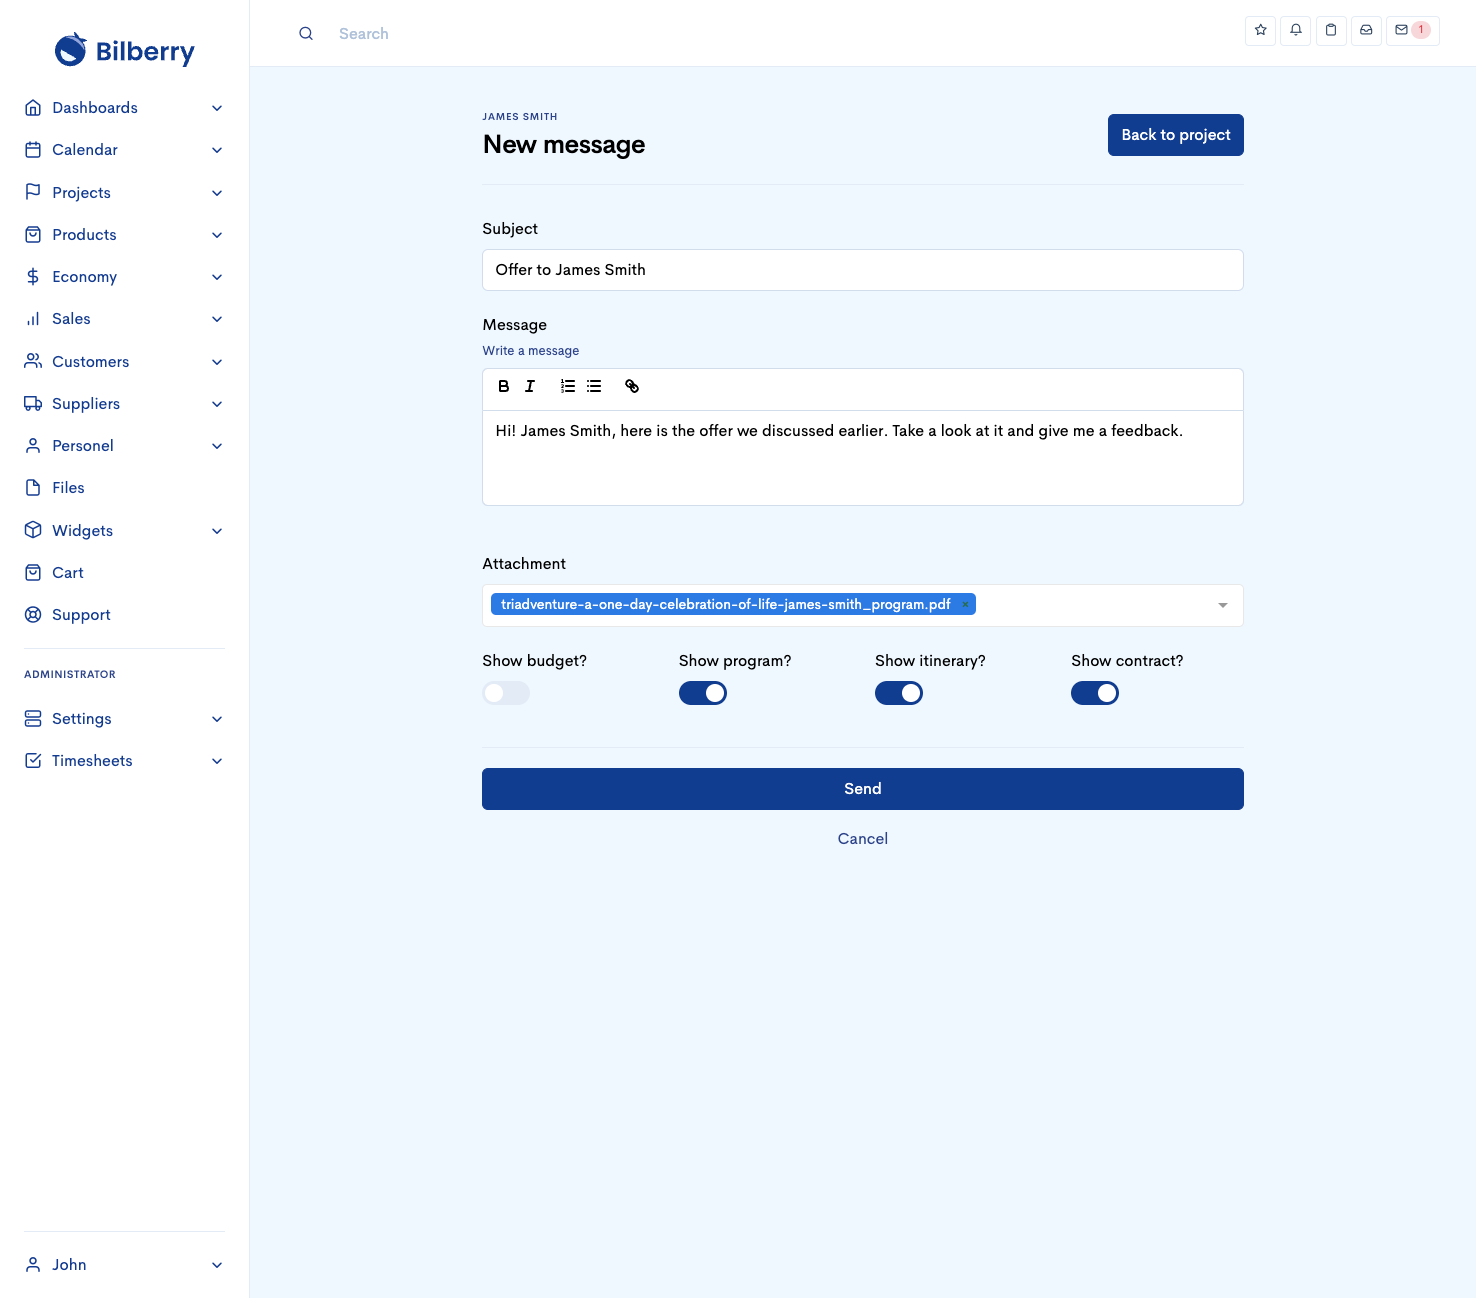
Fill out Subject, Message, add an Attachment if you want, and lastly choose if you want to show your customer the Budget, Program, Itinerary and Contract before clicking Save.
Attachment - You’ll need to upload files from the menu Files under the private event title before you can add an attachment to your private event.
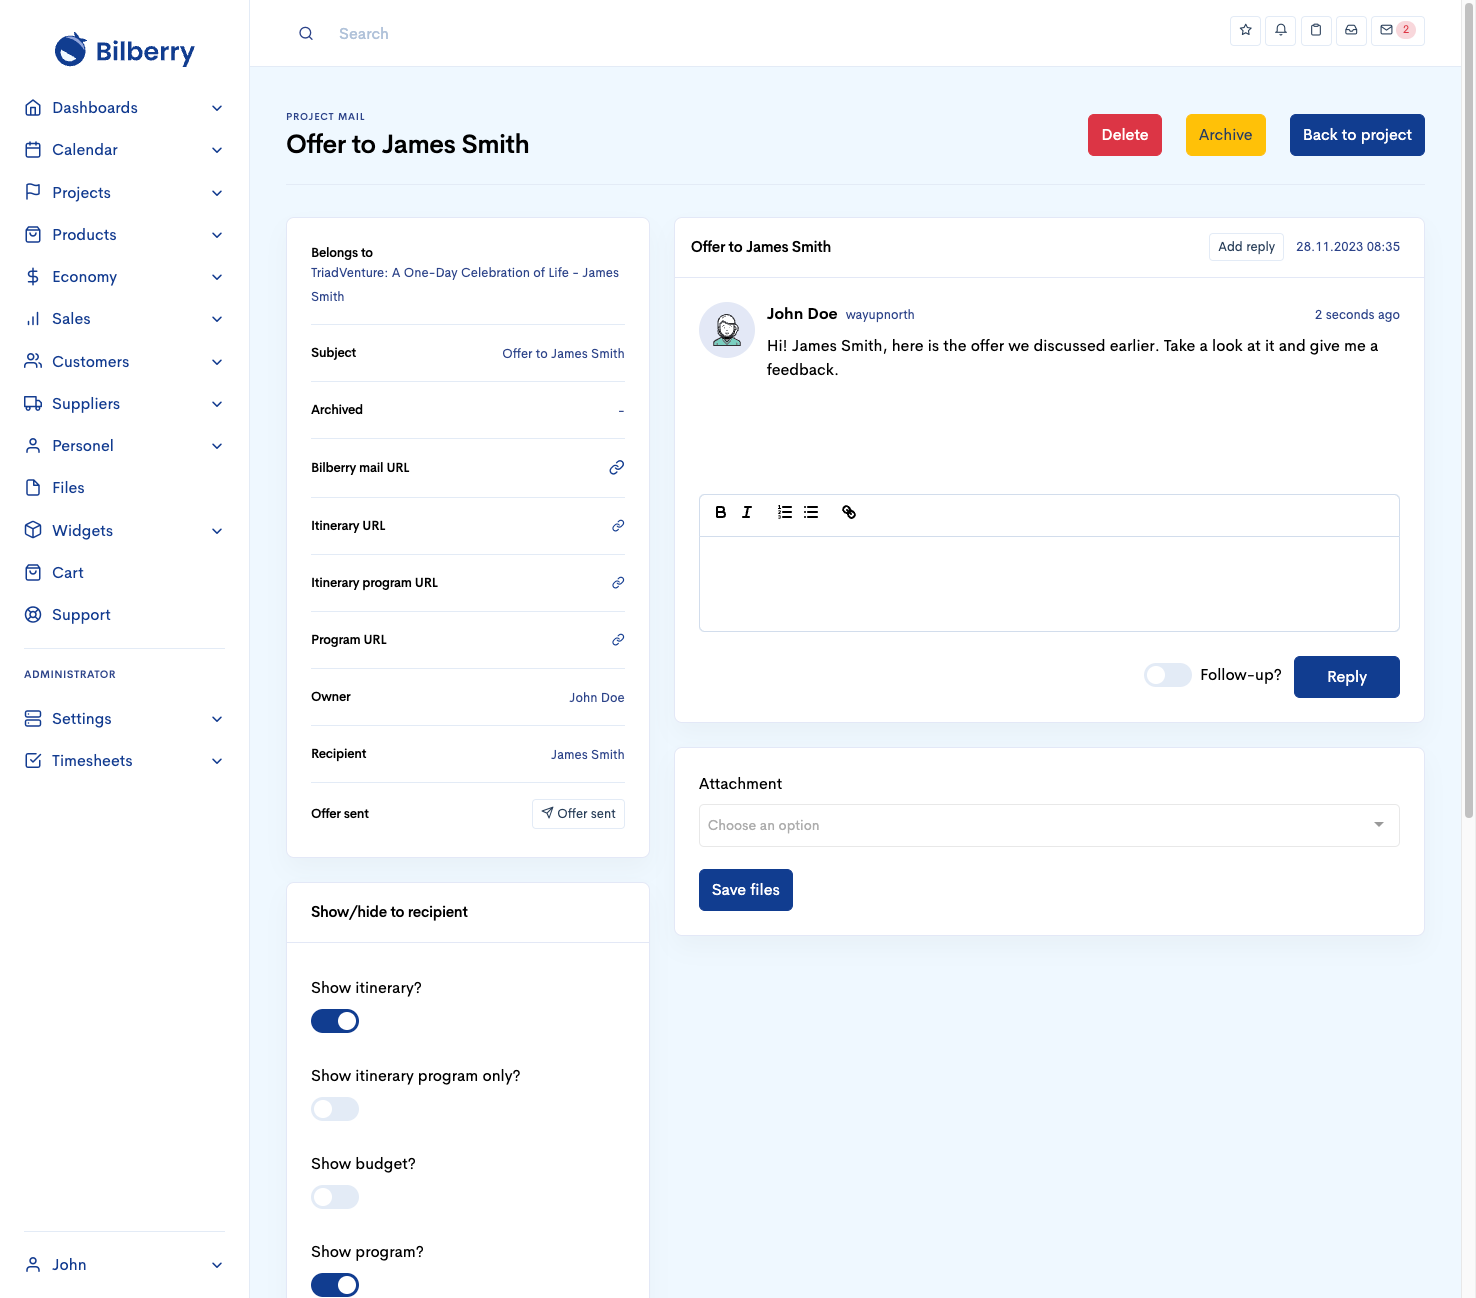
Now you’ll see an overview of what you have sent. From here you can chat with the customer, edit what your customer can see in the offer, and more. To see what the customer sees, you can click on the Bilberry mail URL.
The offer is dynamic, so if the customer wants any changes to the plan, you can go back and edit the project plan, and it will automatically be updated in the offer.
Before leaving this overview, we recommend that you click on Offer sent, so that you can see this from the project overview. Note that it’s also possible to mark it as Offer sent from the project overview, but it’s a good routine to do it from the offer overview.
Offer overview - You can access this any time by going into your private event, click on Costumer under the project title, and then click the correct Subject name.
If you included Show contract in the offer you sent out, your customer will need to accept your offer by checking Agree to terms and conditions, and then click Accept offer.
Terms - Can be created by clicking Products in the main left menu, Settings, and Terms. You can write the terms or link to terms on an external page.
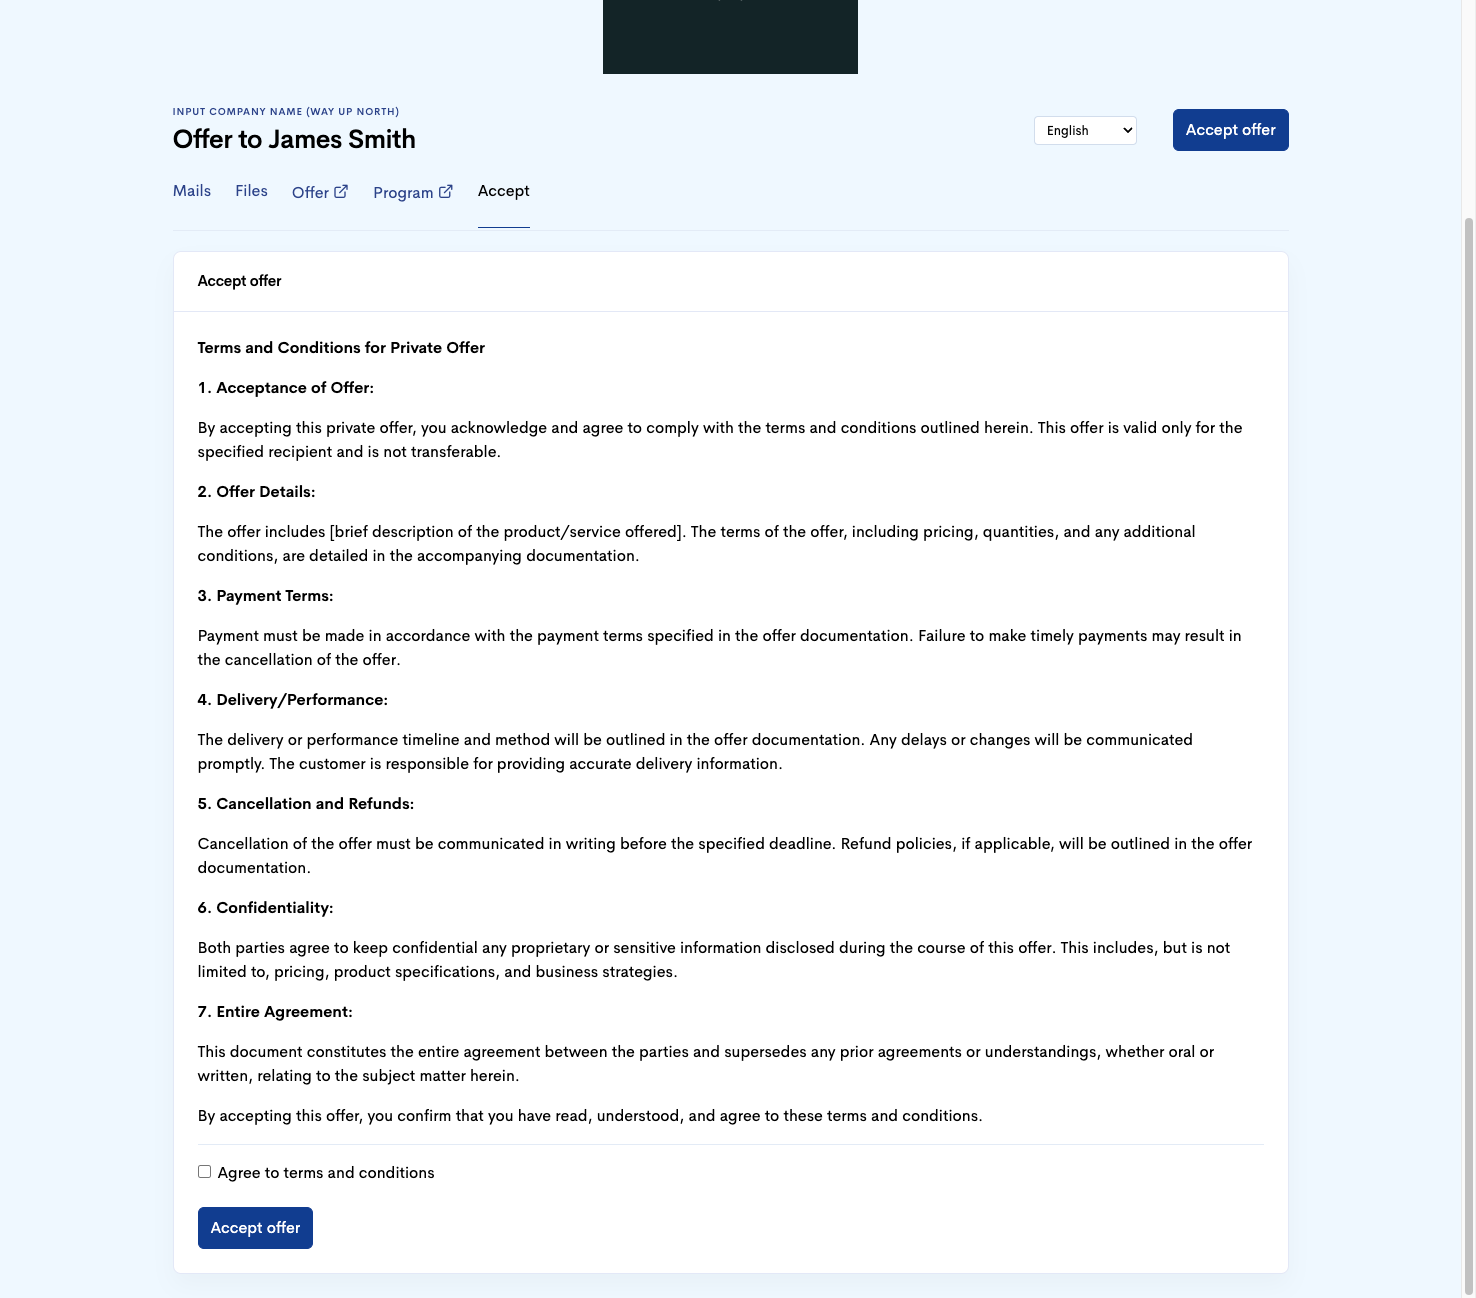
When the offer is accepted, the customer and you can see it as Signed with date and time, and now you can confirm the private event and invoice your customer.