
Update Package Settings and Publish
This article explains the process of how to make the package ready for sale. It covers how to set pricing and availability, choose sales channels, and configure booking, payment, and cancellation policies.
Manage sales periods, pricing and availability
Navigate to the “Distribution” tab.
Select pricing and availability settings.
Use supplier's pricing and availability: Use the supplier’s original prices and available booking dates without any modifications.
Select sales channels: To make the product available in a specific sales channel, turn on the toggle switch. If the switch is off, the product will not be distributed through that channel.
Customize pricing and availability: Set your own sales period and add a markup to the supplier’s prices.
Select to enter the markup in percent or in amount.
Click “Add new sales period”. This information can be changed later.
Name: Enter a name for the sales period, for example for a seasonal or event-based sales period.
Period: Enter the start and end date for the sales period.
Click “Add new sales period”.
Click on the sales period to expand it.
Click “Add new sales channel to sales period”.
Select a sales channel from the list of sales channels.
Click “Add sales channel”.
Click “Show markup details for all ticket types” to expand it.
Enter specific markups for each ticket type in the input fields
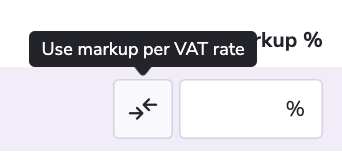
To enter specific markups for each VAT rate for this ticket type, click on the “Use markup per VAT rate” button.
Click “Set VAT Markup”
Select an existing VAT markup rate or add a new one by clicking “New VAT Markup rate” and fill in the input fields.
Update booking document, cut-off and payment settings
Navigate to the “Settings” tab.
Under the “Customer booking” subtab, select how the final documents should be sent to the customer:
Automatically: E-mail customer when all products are confirmed with tickets
Manually: Send the documents to the customer manually.
Enter cut-off date (if applicable).
Navigate to the “Payment” subtab.
Select how the payment should be done:
Full payment when booking: The customer pays in full when booking.
Customer choice: deposit or full payment: The customer chooses to pay a deposit or in full when booking.
Deposit only: The customer pays a deposit when booking.
Select how the deposit should be handled:
Charge deposit in % at the time of booking: Enter a percentage.
Charge deposit in amount at the time of the booking: Enter an amount.
Charge a deposit based on cancellation fee: Enter the number of days before departure when the cancellation fee applies and set a minimum deposit amount.
Enter how many days before departure the full payment must be made.
Customize the deposit text displayed to the customer at checkout.
Click “Save”.
Set the cancellation policy
Navigate to the “Cancellation policy” tab.
Select the type of cancellation policy:
Use supplier’s policy: Blend calculates each supplier’s cancellation policy. If the supplier's policy is unknown, Blend policy override will be used.
Use a predefined policy: Override the supplier’s policy by selecting a predefined cancellation policy, or create a new one. If the supplier has stricter terms, you'll need to refund customers instead of relying on supplier refunds.
Use a unique policy: Create a unique cancellation policy with specific rules for this package.
Click “Save”.
Publish the package in your sales channel
The package must have at least one active sales channel to be published.
Turn on the “Published” toggle switch for the package.
Turn on the “Published” toggle switch for the package versions you want to publish.
Click “Save”.

