
Add Availability to a Product
Make your products available for your customers to book through either a recurring schedule, called a Tour Period, or by creating a Single Tour for a specific day.
If you need to make changes to an existing Tour Period, check out Edit a Tour Period.
Create a Tour Period
There are two paths to creating availability for a product. You can start from either the Product page or the Tour Periods page.
Product Page:
Navigate to the Product (Products → Products → Select the one you’d like to edit).
Select the Availability tab.
Click Add.
Tour Periods Page:
Navigate to Projects → Tour Periods.
Click Create.
Select the product from the dropdown.
This will auto fill some of the information fields with the information that is existing in the product settings, but can be edited.
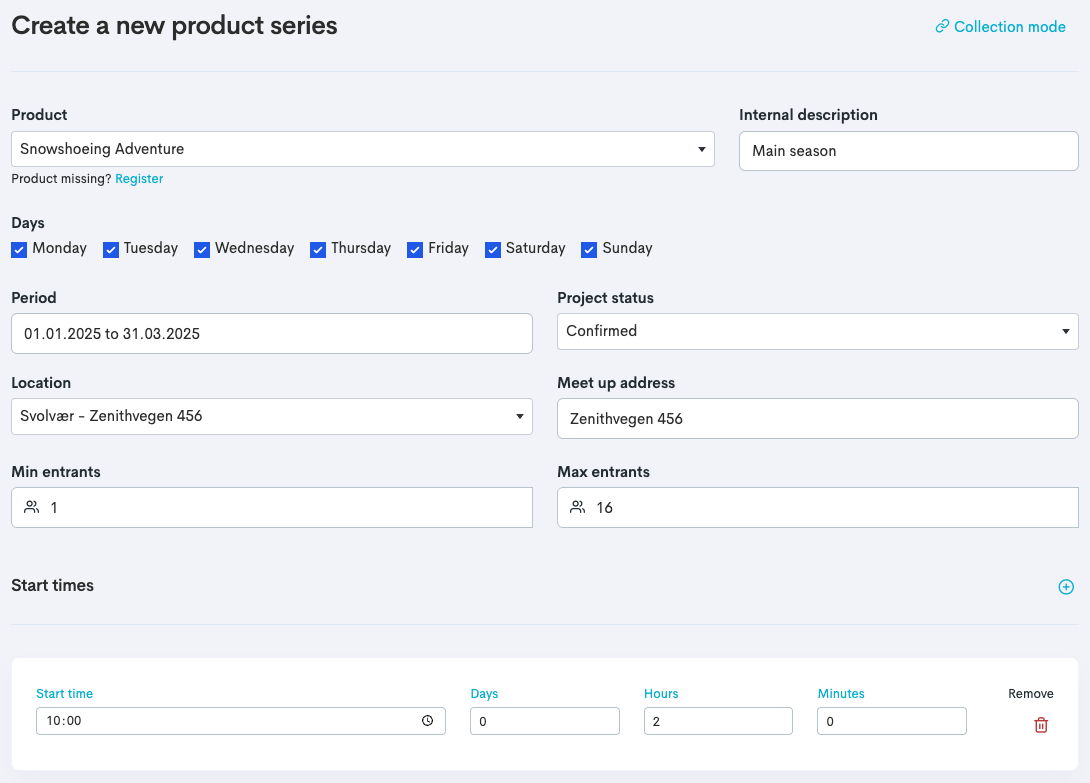
Enter the different settings for the Tour Period:
Setting | Description |
|---|---|
Internal description | You can give the Tour Period a label to be able to distinct a period easily in the list. |
Days | Select the days of the period that the availability will be bookable. |
Period | The period of the Tour Series. |
Project status | Confirmed will make the tour bookable online via your widgets and will appear in your back office Calendar. This is default and our recommendation of usage. Registered will make the tour not bookable online, but the tour will still appear in your back office calendar. Disproved will make the tour not bookable online, and will remove the tour from your calendar completely. |
Location | The location. |
Meet up address | The address to where the customer should meet at tour start. |
Min entrants | Minimum required tickets booked. |
Max entrants | Maximum of tickets possible to book. |
Start times | The start time of the recurring tour. If your tour period has multiple start times you can click the |
Prices | Update the prices, or add new prices. |
Click Register.
Duplicate a Tour Period
Duplicate a Tour Period will create a duplicate with the same settings as the original.
Navigate to the Product page or the Tour Periods page (as mentioned in the first section above).
To the left of the tour you want to duplicate, click the Duplicate tour period
 icon.
icon.Edit the fields you want to edit, explained in the table above.
Click Register.
Create a Single Tour
Navigate to Calendar → Month.
Select the month tab where you want to schedule your single tour.
Click the date (the circle with a number).
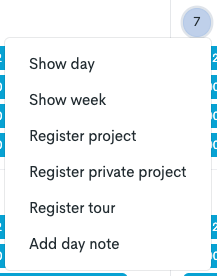
Select Register tour.
Select the product from the dropdown.
This will auto fill some of the information fields with the information that is existing in the product settings, but can be edited.
Edit the fields you want to edit, explained in the table above.
Click Register.