
Curate an Activity Product
This guide will take you step-by step on how to add an activity product to you Blend.
Curate an Activity
Navigate to Activities → Add activity.
Click on the activity that you want to curate from the list of uncurated activities.
Follow the Activity Presentation.
General
We’ll start with general settings for the activity:
As you do the changes in the general settings, please note that the preview of the widget changes simultaneously. This is to get a better understanding of where the information will be displayed for your customer.
All fields are required unless they are marked as optional.
Field | Description |
|---|---|
Name | The name of the product is already prefilled from the supplier. The name of the activity can be changed, if needed. |
Short description (Optional) | Write a short description of what your activity involves. |
Card Label (Optional) | A short wording or phrase that can make the customers more interested in buying the activity. Example: You are curating an activity which is your most popular product, you can then write a label saying “Most popular”. |
Long description | Write an informative description of what your activity involves. In this field you have customization tools to make text look presentable to your liking.  |
Difficulty level (Optional) | Option to choose between three difficulty levels for the activity (Easy, Medium and Hard). |
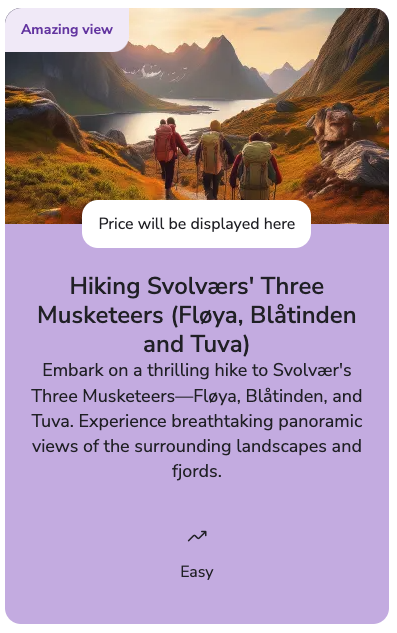
Preview of how the card label looks like.
Locations
Read more about locations in our article Create a Location
Add Start location.
Add End location.
If the end location is the same as the start location, toggle the checkbox Same as start location.
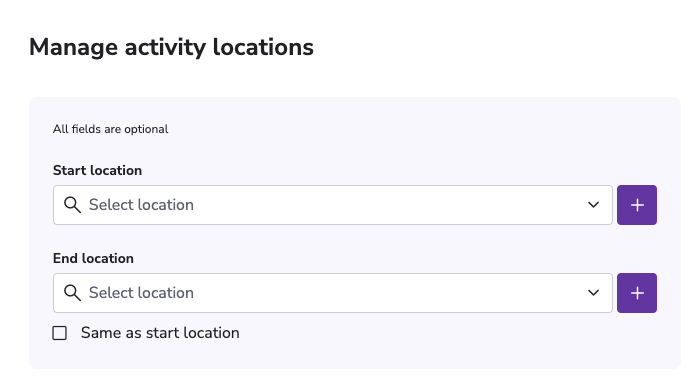
It is possible to create a new location directly when curating a product by clicking on the purple + button.
Click Curate activity in the top right corner.
The activity will be saved and curated with our current settings.
Images
You can read more about images and your Cloudinary settings Cloudinary setup We recommend that the pictures you upload for your activities is in either .png or .jpg format and the file being a reasonable size.
To add an image to your activity, click on the Images tab.
Click the Add image
 button.
To add a header image, click Add image.
To upload images that you have stored locally on your computer, click Upload in the top right corner. You will now be able to navigate to the area where you have stored your images locally on your computer.
Choose the image that you want to upload and click Open.
The image will now upload to your Cloudinary library and can be used for your products.Click on the image you want to use as header image and click Select in the bottom right corner.
You have now uploaded your header image.
You can add more pictures to your product by clicking Add image below your header image. You can also add a Title, a Description, an Alternative text and Credit to the pictures you add.
Categories
For more information about creating or editing categories, go to our guide Add Categories
Click on the category you want to add to the activity.
Click Save.
You can have multiple categories on an activity. If you want to remove a category, simply click on x for the category you want to remove.
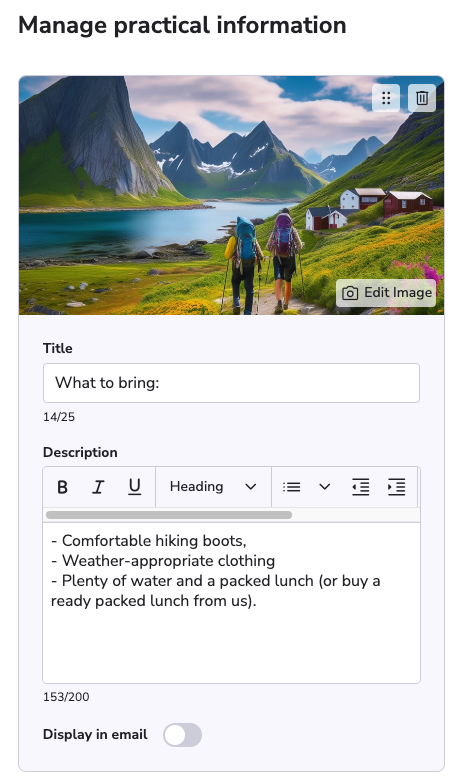
Practical information (Optional)
If the product should display practical information that customers need to know, you can create a practical information field that will be displayed on their MyPage link.
Add a Title.
Add a Description.
Choose if this should display in the email sent to the customer upon booking.
Example:

How it appears on a customers' MyPage.
MyPage (Optional)
Adding links to MyPage is optional but adds value for your customers by offering them additional information they may be looking for.
One or two links are usually enough to provide that extra information, but you're free to add as many as you'd like.
Example: Click on the pictures to enlarge.
Add a Title.
Add a Description.
Add a Link URL for the direction.
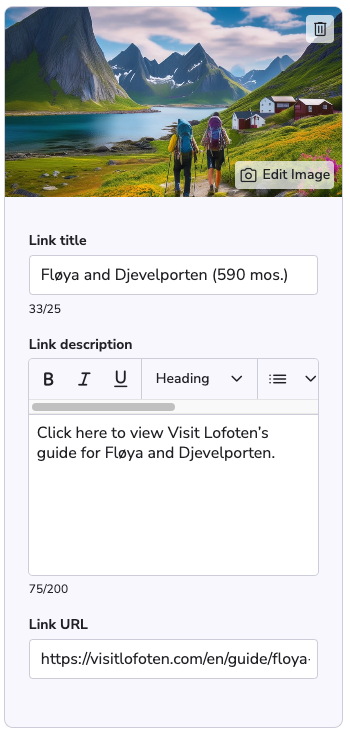
Setup for a link in backoffice.

How it appears on a customers' MyPage.
Connect
By default, our Search Results Widget displays product information in a modal.
However, if you have created dedicated product pages in your CMS, you can link your product in Blend to your custom page, by adding the External URL here. When a customer clicks on a product in the search results, they will be directed to the URL you have provided.
Next will be to add ticket types: Add Ticket Types